Fair warning: This is about making full use of the network, not getting it for free. You must have a means to access external networks from within the campus network (i.e., you need such a device), and you must also be able to control that device.
To take my school as an example: every student is assigned a default campus network account that only allows access to the campus LAN. If you purchase campus broadband at the school’s service center, it gets linked to your account, enabling internet access.
First, verify whether there are no restrictions on your campus LAN.
To test this, log into the LAN and ping the private IP address of an account that already has external network access. If the ping succeeds, congratulations – you can now provide free internet access to everyone on campus 🤣. Of course, there’s also the issue of the number of devices: at my school, only one NAT operation is required; subsequent devices won’t be detected, so this setup works. If your school enforces stricter controls, you can use plugins to disguise traffic.
Alright, let’s move on to the tutorial.
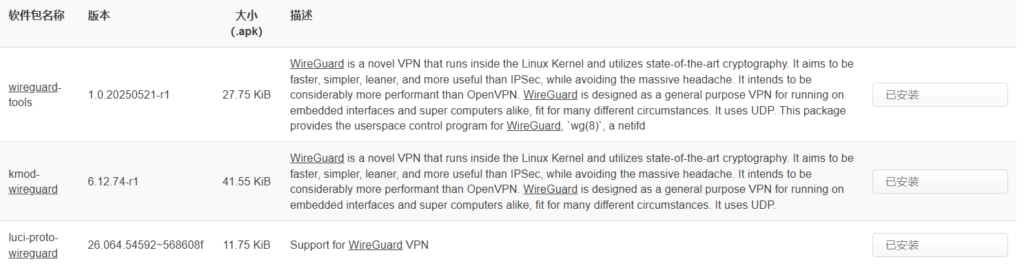
First, connect a router to the campus network (external network). The router must run OpenWrt. Search for WireGuard and install these three packages:
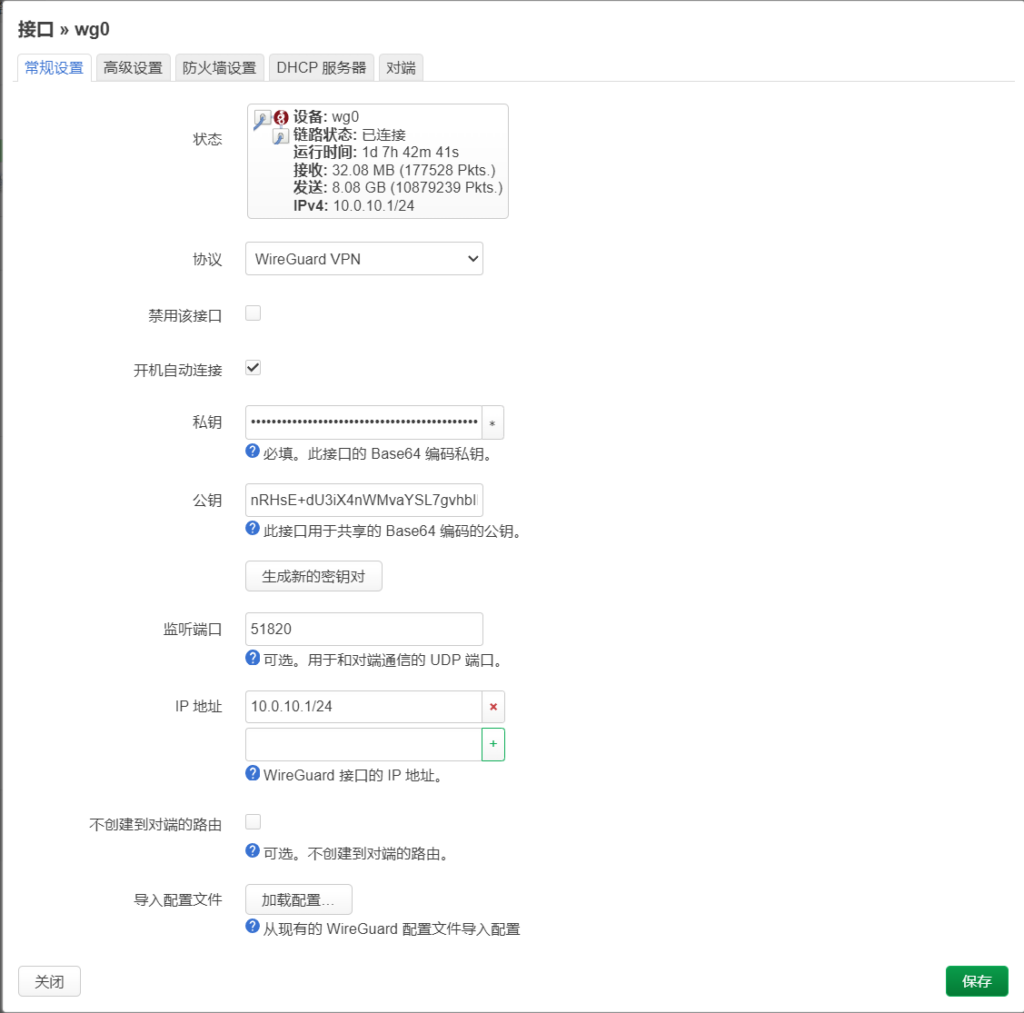
After installation, restart the network service or reboot the router. Then go to Network > Interfaces, create a new interface, select WireGuard VPN as the protocol. On the following screen, click to generate a new key pair, set the listening port to 51820 (any port works), and enter the IP address
10.0.10.1/24
Next, create a separate firewall zone for this interface, then navigate to Peers and click Add Peer.
Now open the WireGuard client – it works on both phones and computers; we’ll use a phone as an example here. Download the WireGuard mobile app first; if you don’t know how, click here. After opening the app, tap the bottom-right corner, choose Manual Creation, click the circular icon next to Private Key, then copy the public key into the corresponding field. Enter 10.0.10.2/32 under Allowed IPs and save the settings.
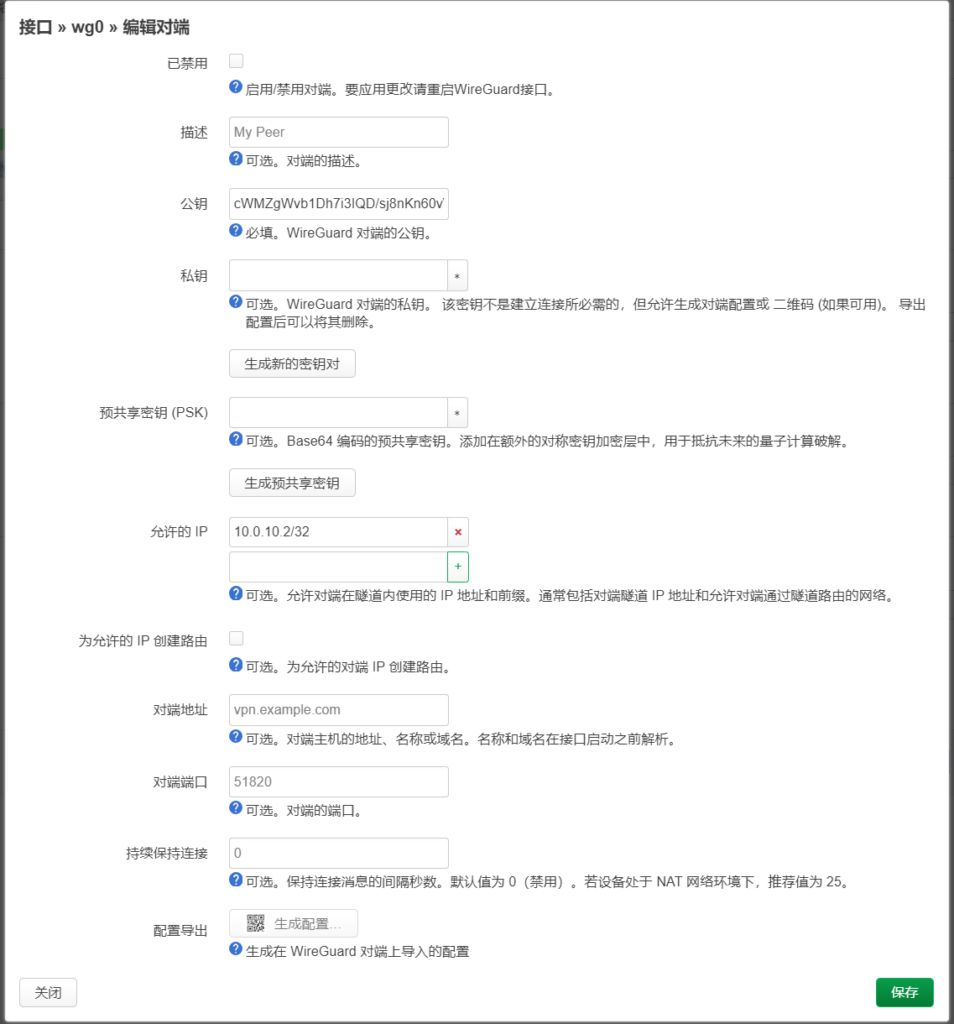
Continue setting up on your phone: set the local IP to 10.0.10.2/24, and the DNS server to 223.5.5.5 (any DNS server works). Under Remote, paste the public key from the router – that is, the public key shown in this image. Enter your router’s private IP address plus port x.x.x.x:51820 in the Peer field, and set Route IP to 0.0.0.0/0.
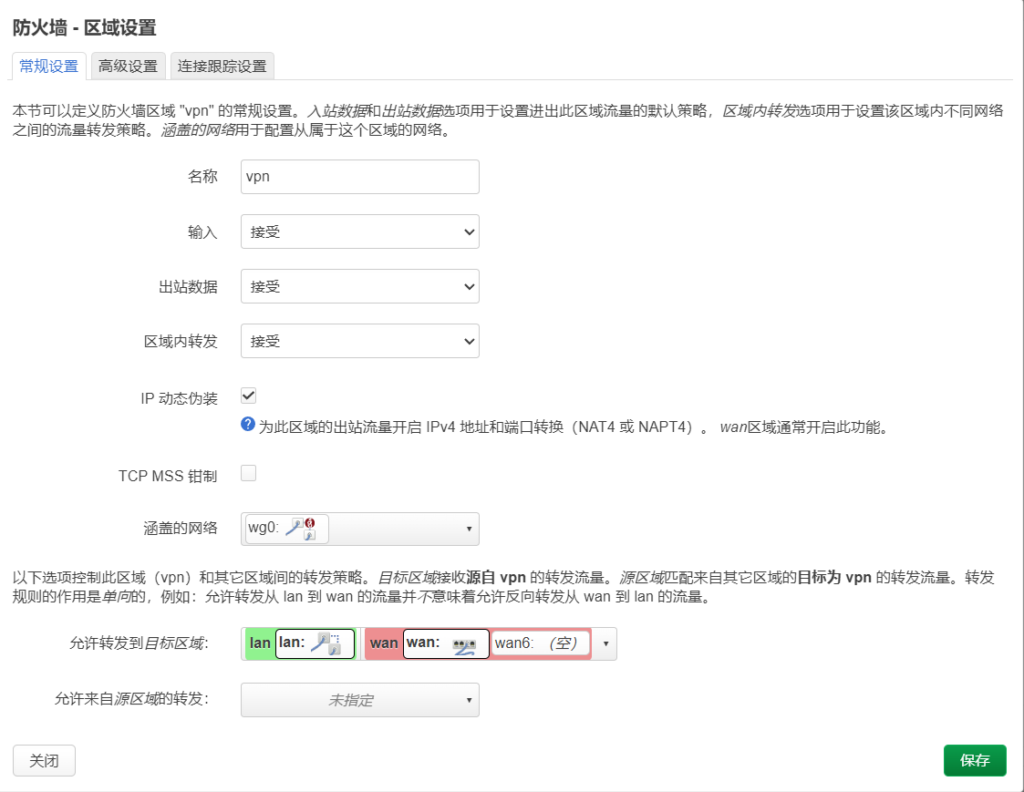
Return to the router’s firewall settings, edit the firewall zone created earlier for this interface, and enable all options exactly as shown below; make sure to tick IP masquerading.
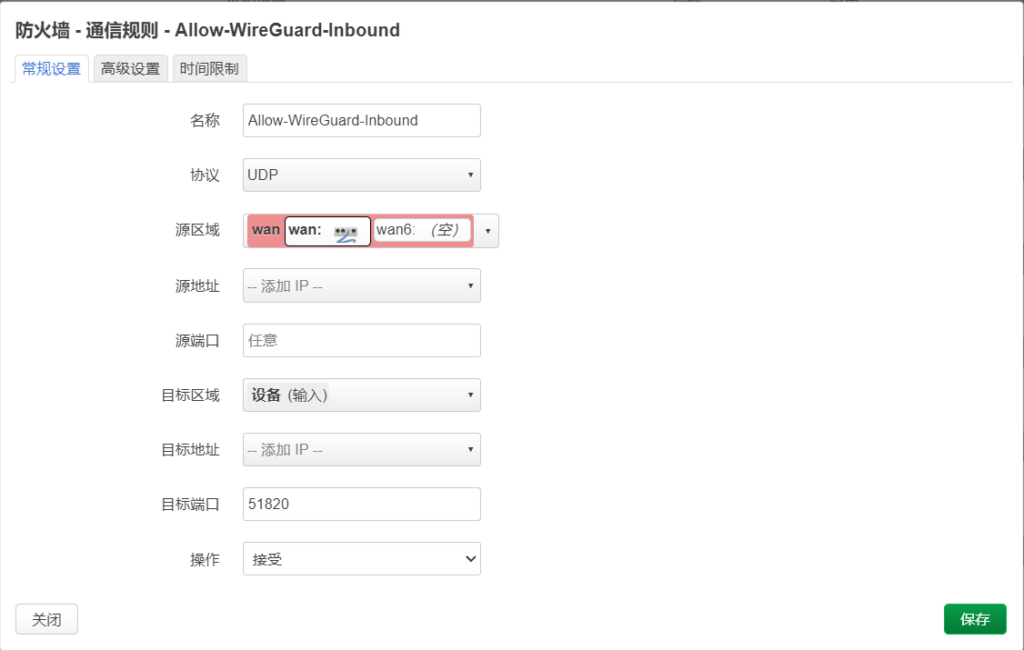
Then go to Firewall > Communication Rules and add a rule identical to the one below.
You can now attempt to connect – following these steps should work without issues.